Looking for a mouthwatering gluten-free pancake recipe? You’re in luck! In this article, we bring you a delicious gluten-free pancake recipe that will surely satisfy your cravings. Whether you have dietary restrictions or simply want to explore a healthier alternative, these pancakes are a perfect choice. Get ready to indulge in a stack of fluffy and flavorful gluten-free pancakes that are bound to become your new favorite breakfast treat!
- 1. Introduction
- 1.1. What is gluten-free?
- 1.2. Why choose gluten-free pancakes?
- 1.3. Benefits of gluten-free pancakes
- 1.4. Ingredients for gluten-free pancakes
- 1.5. Equipment needed
- 2. Preparing the Pancake Batter
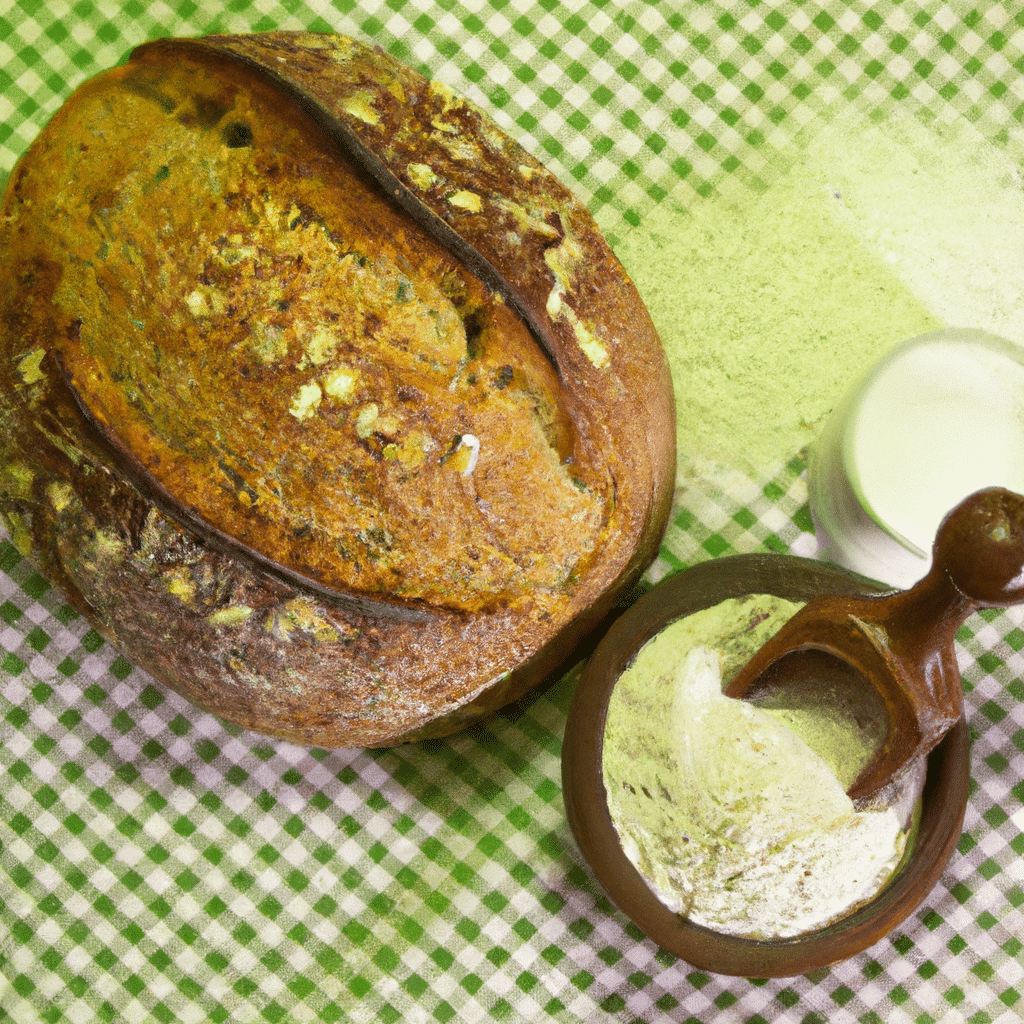
- 2.1. Selecting the right flour
- 2.2. Combining dry ingredients
- 2.3. Mixing wet ingredients
- 2.4. Combining wet and dry ingredients
- 2.5. Resting the batter
- 3. Cooking the Pancakes
1. Introduction
Are you tired of the same old breakfast routine? Do you have dietary restrictions that make it challenging to find delicious and satisfying options? Look no further! In this article, we will share a mouthwatering gluten-free pancake recipe that is sure to delight your taste buds. Whether you have celiac disease or simply prefer to avoid gluten, these pancakes are a perfect choice. Get ready to indulge in a stack of fluffy, golden pancakes that are both healthy and scrumptious!
1.1. What is gluten-free?
Gluten-free refers to a dietary lifestyle that excludes the protein gluten. Gluten is commonly found in grains such as wheat, barley, and rye. It is also present in many processed foods, sauces, and condiments. For individuals with celiac disease or gluten sensitivity, consuming gluten can lead to various health issues and discomfort. Therefore, gluten-free diets have become increasingly popular. The main goal of a gluten-free diet is to eliminate gluten-containing ingredients and replace them with gluten-free alternatives. In recent years, there has been a rise in gluten-free products and recipes to cater to the growing demand. These include delicious gluten-free pancakes that can be enjoyed by everyone, regardless of dietary restrictions.
1.2. Why choose gluten-free pancakes?
Gluten-free pancakes have gained popularity in recent years due to the increasing number of people with gluten sensitivities or celiac disease. These pancakes are made without any gluten-containing ingredients, making them a safe and delicious option for those who need to follow a gluten-free diet. But why should you choose gluten-free pancakes? Let’s explore the reasons.
Firstly, opting for gluten-free pancakes allows individuals with gluten sensitivities or celiac disease to enjoy a beloved breakfast staple without any adverse effects. Gluten, which is found in wheat, barley, and rye, can cause digestive issues and damage to the small intestine in those who are intolerant or allergic to it. By choosing gluten-free pancakes, people can still indulge in a tasty breakfast without compromising their health.
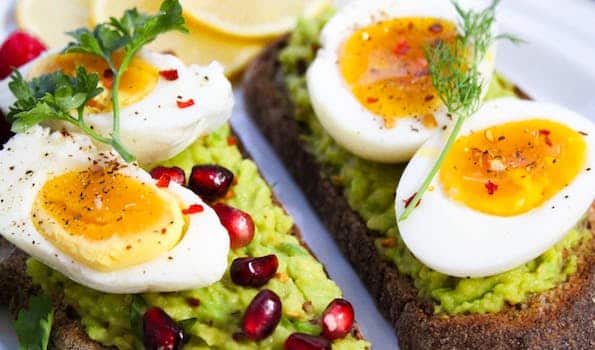
Moreover, gluten-free pancakes offer a variety of health benefits. They are often made with nutritious alternative flours such as almond flour, coconut flour, or buckwheat flour. These flours are rich in vitamins, minerals, and fiber, providing a wholesome and filling breakfast option. Additionally, gluten-free pancakes can be customized with various toppings, such as fresh fruits, nuts, or honey, adding even more nutritional value to the meal.
Lastly, gluten-free pancakes are not only suitable for those with gluten sensitivities but can also be enjoyed by anyone looking for a healthier alternative. Many people opt for gluten-free options as part of their overall wellness routine, as it can aid in weight management and promote better digestion.
In conclusion, choosing gluten-free pancakes is a fantastic option for individuals with gluten sensitivities or celiac disease. Not only do they provide a safe and tasty alternative, but they also offer various health benefits. Whether you have dietary restrictions or simply want to explore new flavors, gluten-free pancakes are a delicious addition to any breakfast menu.
1.3. Benefits of gluten-free pancakes
Gluten-free pancakes have gained popularity in recent years due to the increasing number of people with gluten sensitivities or celiac disease. These pancakes are made without wheat flour, which contains gluten, and instead use alternative gluten-free flours such as almond flour, rice flour, or tapioca flour. The benefits of gluten-free pancakes extend beyond catering to dietary restrictions. They offer a range of advantages that make them a delicious and nutritious option for everyone to enjoy. In this article, we will explore the various benefits of gluten-free pancakes and provide a delightful gluten-free pancake recipe for you to try.
1.4. Ingredients for gluten-free pancakes
Gluten-free pancakes are a delightful alternative for those who have dietary restrictions or choose to avoid gluten. With a few simple ingredients, you can create a delicious and satisfying breakfast option that everyone can enjoy. Whether you have celiac disease, gluten intolerance, or simply want to explore gluten-free options, these pancakes are a fantastic choice. In this article, we will discuss the key ingredients needed to make scrumptious gluten-free pancakes. So, let’s jump right in and discover how to make these mouthwatering pancakes!
1.5. Equipment needed
When it comes to making delicious gluten-free pancakes, having the right equipment is essential. By using the right tools, you can ensure that your pancakes turn out fluffy, light, and perfectly cooked. In this section, we will discuss the equipment you’ll need to create the best gluten-free pancake recipe.
1. Mixing Bowl: A large mixing bowl is necessary for combining all the pancake ingredients. Make sure to choose a bowl that is big enough to accommodate the batter and allows for easy mixing.
2. Whisk: A whisk is the ideal tool for blending the ingredients together and creating a smooth pancake batter. It helps to remove any lumps and ensures that all the ingredients are well incorporated.
3. Non-Stick Skillet or Griddle: A non-stick skillet or griddle is essential for cooking pancakes without sticking. It provides even heat distribution and allows for easy flipping of the pancakes.
4. Spatula: A wide and sturdy spatula is necessary for flipping the pancakes without breaking them. It helps to carefully turn the pancakes over and ensures that they are cooked evenly on both sides.
5. Measuring Cups and Spoons: Accurate measurements are crucial in baking, so having a set of measuring cups and spoons is essential. They help you measure the ingredients precisely and maintain the right balance of flavors.
6. Cooking Oil or Spray: To prevent the pancakes from sticking to the skillet or griddle, you’ll need some cooking oil or non-stick spray. This ensures that the pancakes are easily released and helps in achieving a golden brown texture.
Now that we have discussed the necessary equipment, let’s move on to the next section where we’ll introduce the delicious gluten-free pancake recipe.
2. Preparing the Pancake Batter
To create a delicious gluten-free pancake recipe, it all starts with preparing the pancake batter. This step is crucial in ensuring the final result is fluffy, light, and full of flavor. Here is a simple guide to help you prepare the perfect pancake batter.
First, gather all the necessary ingredients. For a gluten-free version, you will need gluten-free flour, such as almond flour or rice flour. Make sure to check the label to ensure it is certified gluten-free. You will also need baking powder, salt, sugar, eggs, milk (or a non-dairy alternative), and melted butter (or oil).
Next, in a large mixing bowl, combine the gluten-free flour, baking powder, salt, and sugar. Whisk them together until well combined. This will help distribute the dry ingredients evenly throughout the batter.
In a separate bowl, whisk the eggs until they are well beaten. Then, add the milk and melted butter (or oil) to the eggs and whisk again until everything is well mixed.
Now, it’s time to combine the wet and dry ingredients. Pour the wet mixture into the bowl with the dry ingredients. Use a whisk or a spatula to gently fold the ingredients together. Be careful not to overmix, as this can result in tough pancakes.
Once the batter is well combined, let it sit for a few minutes. This allows the gluten-free flour to absorb the liquid and helps the batter thicken slightly.
While the batter is resting, preheat a non-stick skillet or griddle over medium heat. This will ensure even cooking and prevent the pancakes from sticking.
When the skillet is hot, lightly grease it with cooking spray or a small amount of butter. Then, using a ladle or a measuring cup, pour the pancake batter onto the skillet to form pancakes of your desired size. Cook until bubbles start to form on the surface, then flip the pancakes and cook for an additional minute or two.
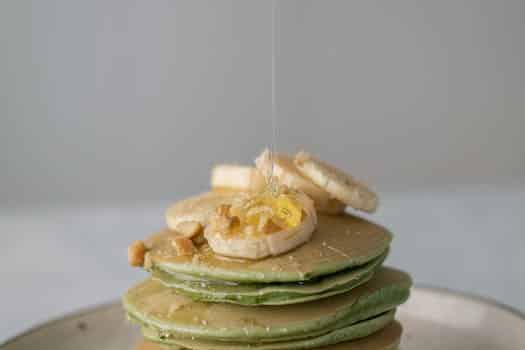
Once the pancakes are cooked through and golden brown, transfer them to a plate and repeat the process with the remaining batter. Serve the pancakes warm with your favorite toppings, such as maple syrup, fresh fruit, or whipped cream.
By following these steps, you can create a delicious gluten-free pancake batter that will impress your family and friends. Enjoy!
2.1. Selecting the right flour
When it comes to making delicious gluten-free pancakes, selecting the right flour is crucial. Gluten-free flours are made from grains or nuts that do not contain gluten, a protein found in wheat, barley, and rye. There are various types of gluten-free flours available in the market, each with its own unique characteristics and flavors.
One popular option is rice flour, which is known for its mild taste and smooth texture. It is a versatile flour that can be used in a variety of recipes, including pancakes. Another common choice is almond flour, which adds a rich and nutty flavor to the pancakes.
For those looking for a more nutritious option, buckwheat flour is a great choice. It is not actually a type of wheat but a seed that is ground into flour. Buckwheat flour is high in fiber and protein, making it a healthier alternative.
When selecting the right flour for your gluten-free pancakes, it is important to consider the desired taste and texture. Some flours may result in denser pancakes, while others may create a lighter and fluffier texture. Experimenting with different flours and ratios can help you find the perfect combination for your preference.
Now that you have selected the right flour, it’s time to prepare the pancake batter. Start by combining the flour, baking powder, and a pinch of salt in a mixing bowl. In a separate bowl, whisk together the wet ingredients, such as eggs, milk (or dairy-free alternative), and melted butter (or oil).
Gradually pour the wet ingredients into the dry ingredients while whisking, ensuring that there are no lumps. The batter should have a smooth and pourable consistency. If it appears too thick, you can add a little more milk to thin it out.
Once the pancake batter is ready, preheat a non-stick skillet or griddle over medium heat. Lightly grease the surface with butter or oil to prevent sticking. Using a ladle or measuring cup, pour the batter onto the skillet to form pancakes of your desired size.
Cook the pancakes for a few minutes until bubbles start to form on the surface. This indicates that the bottom side is cooked and ready to flip. Gently flip the pancakes using a spatula and cook for another minute or two until both sides are golden brown.
Serve the gluten-free pancakes warm with your favorite toppings, such as maple syrup, fresh fruits, or a dollop of whipped cream. Enjoy the delicious and fluffy pancakes that are not only gluten-free but also bursting with flavor!
2.2. Combining dry ingredients
To prepare the pancake batter, start by combining the dry ingredients. In a mixing bowl, whisk together the gluten-free flour blend, baking powder, sugar, and salt. Make sure all the ingredients are well combined and evenly distributed.
The gluten-free flour blend can be made by combining different gluten-free flours such as rice flour, almond flour, and tapioca flour. This blend provides a good texture and flavor to the pancakes.
Next, create a well in the center of the dry ingredients. This will be used to pour in the wet ingredients later on. In a separate bowl, whisk together the milk, eggs, and melted butter or oil.
Pour the wet ingredients into the well of the dry ingredients. Using a whisk or a spatula, gently stir the mixture until just combined. Be careful not to overmix, as this can result in tough pancakes.
If desired, you can add additional ingredients to the batter at this point, such as blueberries, chocolate chips, or chopped nuts. Stir them in gently.
The pancake batter is now ready to be cooked. Preheat a non-stick skillet or griddle over medium heat and lightly grease it with butter or oil. Spoon the batter onto the hot surface to form pancakes of your desired size.
Cook the pancakes for a few minutes on each side until golden brown and cooked through. Serve them warm with your favorite toppings and enjoy!
2.3. Mixing wet ingredients
To start preparing the pancake batter, you will need to mix the wet ingredients together. This step is crucial as it determines the texture and flavor of the pancakes. In a mixing bowl, combine the wet ingredients, which typically include eggs, milk (or a non-dairy alternative), and melted butter (or oil for a dairy-free option). Whisk these ingredients together until well blended. For a gluten-free recipe, make sure to use gluten-free milk and butter substitutes if needed. Once the wet ingredients are thoroughly mixed, you can move on to the next step of the recipe.
2.4. Combining wet and dry ingredients
To prepare the pancake batter, you will need to combine both wet and dry ingredients. This step is crucial in ensuring a smooth and well-incorporated batter.
Start by gathering your dry ingredients, which typically include gluten-free flour, baking powder, salt, and any additional spices or flavors you prefer. In a mixing bowl, whisk together these dry ingredients until they are thoroughly combined.
Next, it’s time to add the wet ingredients. This usually includes milk (or a dairy-free alternative), eggs, and a sweetener such as maple syrup or honey. Slowly pour the wet ingredients into the bowl with the dry ingredients, while continuously whisking the mixture. Continue whisking until all the ingredients are fully blended and you achieve a smooth batter.
It’s important not to overmix the batter, as this can result in tough pancakes. Once the wet and dry ingredients are combined, let the batter rest for a few minutes to allow the gluten-free flour to hydrate properly.
Now that your pancake batter is ready, you can proceed to cook your delicious gluten-free pancakes on a preheated griddle or skillet. Enjoy!
2.5. Resting the batter
Resting the batter is an essential step in preparing the perfect pancake. Allowing the batter to rest for at least 15 minutes before cooking helps to activate the gluten-free flour and allows the ingredients to fully combine. During this resting period, the flour particles absorb the liquid, resulting in a smoother and more consistent batter.
Resting the batter also gives it time to thicken slightly. This is particularly important in gluten-free pancake recipes, as gluten-free flours tend to be lighter and have a different texture compared to regular flours. Allowing the batter to thicken helps to achieve a more substantial and fluffy pancake.
To rest the batter, simply cover the bowl with a clean kitchen towel or plastic wrap and let it sit at room temperature. This resting period can also be used to prepare any desired toppings or heat up the griddle or frying pan.
3. Cooking the Pancakes
To cook the pancakes, start by preheating a non-stick skillet or griddle over medium heat. In a large mixing bowl, combine the gluten-free flour, baking powder, sugar, and salt. In a separate bowl, whisk together the milk, eggs, and melted butter. Pour the wet ingredients into the dry ingredients and stir until just combined. Be careful not to overmix, as this can result in tough pancakes.
Once the batter is ready, lightly grease the preheated skillet or griddle with a small amount of oil or cooking spray. Use a measuring cup or ladle to pour about 1/4 cup of batter onto the hot surface for each pancake. Cook until bubbles form on the surface and the edges start to look set, usually about 2-3 minutes. Flip the pancakes and cook for an additional 1-2 minutes, or until golden brown and cooked through.
Transfer the cooked pancakes to a plate and keep warm while you cook the remaining batter. Serve the pancakes warm with your favorite toppings, such as maple syrup, fresh fruits, or whipped cream. Enjoy these delicious gluten-free pancakes for a delightful breakfast or brunch!
3.1. Choosing the right cooking surface
When it comes to cooking the perfect pancakes, choosing the right cooking surface is crucial. The cooking surface you use can greatly affect the texture and taste of your pancakes. There are several options to consider when selecting a cooking surface for pancakes.
One popular choice is a non-stick frying pan. Non-stick pans are convenient and easy to use, as they require less oil and prevent the pancakes from sticking to the surface. This ensures that your pancakes come out beautifully golden and intact.
Another option is a cast iron skillet. Cast iron skillets are known for their excellent heat retention and even heat distribution. This means that your pancakes will cook evenly and have a crispy exterior. However, cast iron skillets require seasoning and proper maintenance to prevent food from sticking.
For those looking for a healthier alternative, a ceramic non-stick pan can be a great option. Ceramic pans are free from harmful chemicals and provide a non-stick surface without the need for excessive oil. They are also easy to clean and maintain.
Ultimately, the choice of cooking surface for pancakes depends on personal preference and the desired outcome. Experimenting with different surfaces can help you find the perfect one that suits your cooking style and produces delicious gluten-free pancakes.
3.2. Preheating the pan
Preheating the pan is an essential step in cooking perfect pancakes. To achieve a golden brown and evenly cooked pancake, it’s important to properly heat the pan before pouring the batter. Here’s how to preheat the pan for cooking delicious gluten-free pancakes:
1. Place a non-stick frying pan or griddle on the stovetop over medium heat.
2. Allow the pan to heat up for a few minutes until it’s hot to the touch.
3. To test if the pan is ready, sprinkle a few drops of water onto the surface. If the water sizzles and evaporates immediately, the pan is properly preheated.
Preheating the pan ensures that the batter cooks evenly and prevents sticking. Skipping this step may result in pancakes that are undercooked or unevenly browned. Take the time to preheat the pan, and you’ll be rewarded with fluffy and delicious gluten-free pancakes!
3.3. Pouring and spreading the batter
Once you have prepared the gluten-free pancake batter, it’s time to pour and spread it onto a hot griddle or non-stick pan. Make sure the pan is well-greased or use cooking spray to prevent sticking.
To pour the batter, use a ladle or a measuring cup to scoop out the desired amount. Start by pouring the batter onto the center of the pan, allowing it to naturally spread out into a circular shape. Use the back of the ladle or the bottom of the measuring cup to spread the batter evenly, creating a thin and even layer.
Cook the pancakes on medium heat until you see bubbles forming on the surface. This usually takes about 2-3 minutes. Once the bubbles start to pop and the edges of the pancakes look set, it’s time to flip them over.
Using a spatula, carefully flip the pancakes and cook for another 1-2 minutes on the other side, or until they are golden brown. Transfer the cooked pancakes to a plate and repeat the pouring and spreading process with the remaining batter.
Serve the delicious gluten-free pancakes warm with your favorite toppings such as maple syrup, fresh fruits, or a dollop of whipped cream. Enjoy!
3.4. Cooking the first side
Cooking the first side:
1. Heat a non-stick skillet or griddle over medium heat.
2. Once the skillet is hot, lightly grease it with cooking spray or a small amount of oil.
3. Pour approximately 1/4 cup of the pancake batter onto the skillet for each pancake.
4. Use the back of a spoon or a ladle to spread the batter into a circular shape.
5. Cook the pancakes for about 2-3 minutes, or until small bubbles start to form on the surface.
6. Carefully flip the pancakes using a spatula, and cook for an additional 2-3 minutes on the other side.
7. Repeat the process with the remaining batter, adding more oil if needed.
Cooking the Pancakes:
1. After flipping the pancakes, you can start preparing the toppings or keep them warm in a preheated oven.
2. Serve the cooked pancakes hot with your favorite toppings, such as fresh fruits, syrup, honey, or whipped cream.
3. Enjoy your delicious gluten-free pancakes!
3.5. Flipping and cooking the second side
Once you have successfully flipped the pancakes, it’s time to cook the second side. Gently press down on the pancake with a spatula to ensure even cooking. Cook for an additional 2-3 minutes, or until the second side is golden brown and cooked through. The pancakes should be fluffy and slightly crispy on the outside. Repeat this process for the remaining batter, adding more oil to the pan as needed. Once all the pancakes are cooked, serve them hot and enjoy!
Conclusion
In conclusion, this delicious gluten-free pancake recipe is a perfect choice for those who follow a gluten-free diet but still want to enjoy a scrumptious breakfast. With its simple ingredients and easy-to-follow instructions, you can whip up a batch of fluffy and flavorful pancakes in no time. Whether you have celiac disease or simply prefer gluten-free options, these pancakes are sure to satisfy your cravings without compromising on taste. Give this recipe a try and indulge in a delightful breakfast treat!