Are you a chocolate lover with dietary restrictions? Look no further! In this article, we present you with a delightful gluten-free chocolate cake recipe that will satisfy your sweet tooth. Indulge in the rich and moist flavors of this cake, while also adhering to your gluten-free lifestyle. Follow our step-by-step instructions and get ready to enjoy a scrumptious homemade chocolate cake that everyone can indulge in.
- 1. Introduction
- 1.1. What is a gluten-free diet?
- 1.2. Why choose gluten-free chocolate cake?
- 1.3. Benefits of gluten-free chocolate cake
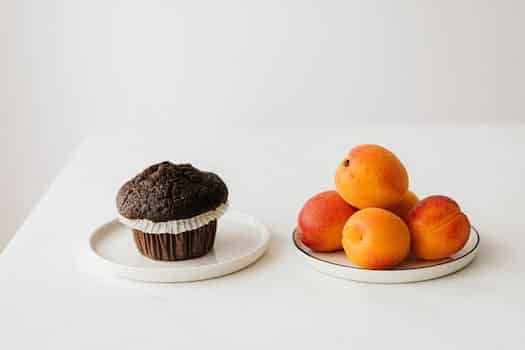
- 1.4. Ingredients needed for gluten-free chocolate cake
- 1.5. Equipment required for making gluten-free chocolate cake
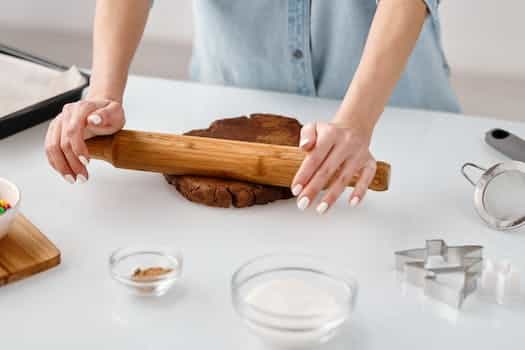
- 2. Preparing the Cake Batter
- 2.1. Choosing the right gluten-free flour
- 2.2. Mixing dry ingredients
- 2.3. Mixing wet ingredients
- 2.4. Combining wet and dry ingredients
- 2.5. Tips for ensuring a smooth cake batter
- 3. Baking and Decorating the Cake
1. Introduction
Are you a fan of chocolate cake but need to follow a gluten-free diet? Look no further! In this article, we will share a delicious gluten-free chocolate cake recipe that is sure to satisfy your sweet tooth. Whether you have celiac disease or simply prefer to avoid gluten, this recipe is a great option for indulging in a decadent dessert. With its moist and rich chocolatey flavor, you won’t even notice that it’s gluten-free. So, let’s get started and learn how to make this mouthwatering chocolate cake!
1.1. What is a gluten-free diet?
A gluten-free diet is a type of eating plan that excludes the protein gluten. Gluten is commonly found in wheat, barley, and rye. People with celiac disease, gluten intolerance, or those who choose to follow a gluten-free lifestyle, adhere to this diet to avoid the negative health effects associated with consuming gluten. A gluten-free diet focuses on consuming foods that are naturally gluten-free, such as fruits, vegetables, lean meats, fish, dairy products, and gluten-free grains like rice and quinoa. It involves avoiding foods and products that contain gluten, such as bread, pasta, cereals, and baked goods. This diet has gained popularity in recent years, as more people have become aware of the potential benefits of eliminating gluten from their diet.
1.2. Why choose gluten-free chocolate cake?
Gluten-free chocolate cake has become increasingly popular among individuals with gluten sensitivities or those following a gluten-free diet. This delectable dessert offers a delicious alternative to traditional chocolate cake, without compromising on taste or texture. Whether you have celiac disease, gluten intolerance, or simply prefer to avoid gluten in your diet, opting for a gluten-free chocolate cake can provide a satisfying and enjoyable sweet treat. With the right ingredients and a few simple substitutions, you can indulge in a moist and flavorful chocolate cake that is free from gluten and full of rich, chocolaty goodness.
1.3. Benefits of gluten-free chocolate cake
Gluten-free chocolate cake is a delectable dessert that not only satisfies your sweet tooth but also offers numerous benefits. For individuals with gluten intolerance or celiac disease, this cake provides a safe and enjoyable treat. By eliminating gluten, a protein found in wheat, barley, and rye, gluten-free chocolate cake becomes a suitable option for those following a gluten-free diet. Additionally, this cake is often made with alternative flours such as almond or coconut flour, which are not only gluten-free but also rich in nutrients. These flours add a unique flavor profile and enhance the texture of the cake. Furthermore, the use of dark chocolate in gluten-free chocolate cake adds an indulgent touch while providing potential health benefits. Dark chocolate is rich in antioxidants and may help improve heart health. With all these advantages, gluten-free chocolate cake is a delightful dessert option that can be enjoyed by everyone, regardless of dietary restrictions.
1.4. Ingredients needed for gluten-free chocolate cake
For all the chocolate lovers out there who have a gluten intolerance, we have the perfect recipe for you! In this article, we will share a delicious gluten-free chocolate cake recipe that is sure to satisfy your sweet tooth. This cake is made with a combination of gluten-free flours and other ingredients that are easily accessible. Whether you are hosting a party or simply craving a decadent treat, this gluten-free chocolate cake will not disappoint!
1.5. Equipment required for making gluten-free chocolate cake
To make a delicious gluten-free chocolate cake, you will need a few essential equipment. These tools will help you achieve the perfect texture and taste while ensuring that the final result is safe for individuals with gluten sensitivities. Here are the equipment required for making a gluten-free chocolate cake:
1. Mixing Bowls: Choose a set of mixing bowls in different sizes to accommodate various ingredients and allow for easy mixing.
2. Whisk or Electric Mixer: A whisk or an electric mixer will help you combine the ingredients thoroughly and create a smooth batter.
3. Measuring Cups and Spoons: Accurate measurements are crucial in baking. Invest in a set of measuring cups and spoons to ensure precision while adding ingredients.
4. Cake Pans: Opt for round cake pans of the desired size to bake the chocolate cake. Non-stick pans or those lined with parchment paper will make it easier to remove the cake.
5. Cooling Rack: A cooling rack is essential to allow the cake to cool evenly once it’s out of the oven. This prevents the bottom from becoming soggy.
6. Offset Spatula: An offset spatula will come in handy for spreading frosting or ganache on the cake’s surface smoothly.
7. Sifter: Use a sifter to remove any lumps from dry ingredients such as cocoa powder or gluten-free flour, ensuring a uniform texture.
8. Rubber Spatula: A rubber spatula is useful for scraping the sides of the mixing bowl and ensuring all ingredients are well incorporated.
Having these equipment ready before you start baking will make the process easier and more enjoyable. Now that you have everything prepared, let’s dive into the delicious gluten-free chocolate cake recipe!
2. Preparing the Cake Batter
To prepare the cake batter for this delicious gluten-free chocolate cake recipe, you will need a few simple ingredients. Start by preheating your oven to the recommended temperature stated in the recipe. Next, gather all the dry ingredients, which typically include gluten-free flour blend, cocoa powder, baking powder, and salt. Sift these dry ingredients together in a large mixing bowl to ensure they are well combined and free of any lumps.
In a separate bowl, cream together the butter and sugar until light and fluffy. You can use an electric mixer for this step to make it easier. Once the butter and sugar are well creamed, add the eggs one at a time, beating well after each addition. This will help incorporate air into the batter and create a light and fluffy texture.
After the eggs are incorporated, it’s time to add the dry ingredients alternately with the liquid ingredients. The liquid ingredients typically include milk and vanilla extract. Begin by adding a portion of the dry ingredients to the butter mixture and mix until just combined. Then, add a portion of the liquid ingredients and continue to mix. Repeat this process, alternating between the dry and liquid ingredients, until everything is well incorporated.
Once the cake batter is mixed thoroughly, pour it into a greased and lined cake pan. Spread the batter evenly using a spatula or the back of a spoon. This will ensure that the cake bakes evenly and rises evenly as well. Tap the cake pan gently on the counter a few times to remove any air bubbles.
Finally, place the cake pan in the preheated oven and bake for the recommended time stated in the recipe. Keep an eye on the cake towards the end of the baking time to prevent overbaking. Once the cake is baked, remove it from the oven and let it cool in the pan for a few minutes. Then, transfer it to a wire rack to cool completely before frosting or serving. Enjoy!
2.1. Choosing the right gluten-free flour
When it comes to baking a delicious gluten-free chocolate cake, choosing the right flour is crucial. With the increasing popularity of gluten-free diets, there are now numerous options available in the market. Here are some factors to consider when selecting the perfect gluten-free flour for your cake:
1. Type of Flour: There are several types of gluten-free flours to choose from, such as almond flour, rice flour, coconut flour, or a blend of different flours. Each type has its unique texture and flavor, which can greatly affect the final taste of your cake.
2. Texture: Consider the desired texture of your cake. Some flours, like almond flour, tend to result in a denser and moister cake, while others, like rice flour, can create a lighter and fluffier texture. Understanding the texture you want will help you make the right choice.
3. Taste: Different gluten-free flours have distinct tastes. Almond flour adds a nutty flavor, coconut flour brings a subtle sweetness, while rice flour has a milder taste. It’s important to select a flour that complements the overall flavor profile of your chocolate cake.
4. Availability: Check the availability of gluten-free flours in your local stores or online. Some flours may be easier to find than others, depending on your location. It’s always helpful to have an idea of where you can purchase the flour before starting your baking process.
By considering these factors, you can choose the right gluten-free flour that best suits your preferences and requirements. Once you have selected the flour, it’s time to move on to preparing the cake batter for your delicious gluten-free chocolate cake.
2.2. Mixing dry ingredients
To start preparing the cake batter, it is essential to properly mix the dry ingredients. This step ensures that the cake has a uniform texture and that the leavening agents are evenly distributed throughout the batter. Begin by sifting together the gluten-free flour, cocoa powder, baking powder, and salt. Sifting helps to remove any lumps and aerates the dry ingredients, resulting in a lighter cake. Once sifted, whisk the dry ingredients together in a large bowl until well combined. This will ensure that the cocoa powder is evenly incorporated and that there are no clumps of baking powder or salt. Set aside the mixture and move on to the next step in creating this delicious gluten-free chocolate cake.
2.3. Mixing wet ingredients
To prepare the cake batter, start by mixing the wet ingredients together. In a large mixing bowl, combine the melted butter, sugar, and vanilla extract. Stir until the sugar is dissolved and the mixture is well combined. Next, add the eggs one at a time, beating well after each addition. This will ensure a smooth and fluffy texture. Gradually pour in the milk, while continuing to mix the batter. Finally, sift in the gluten-free flour, cocoa powder, baking powder, and salt. Use a spatula or whisk to gently fold the dry ingredients into the wet mixture until just combined. Be careful not to overmix, as this can result in a dense cake. The batter should be thick and smooth. Now, you are ready to pour the cake batter into the prepared baking pan and proceed with the baking instructions.
2.4. Combining wet and dry ingredients
When it comes to preparing the cake batter for a delicious gluten-free chocolate cake, it is important to properly combine the wet and dry ingredients. This step is crucial in achieving a moist and flavorful cake.
Start by sifting together the dry ingredients, including gluten-free flour, cocoa powder, baking powder, and salt. Sifting helps to remove any lumps and ensures an even distribution of the ingredients.
In a separate bowl, combine the wet ingredients such as melted butter or oil, sugar, eggs, and vanilla extract. Whisk them together until well blended.
Next, gradually add the dry mixture to the wet mixture, stirring gently with a spatula or whisk. It’s important not to overmix the batter, as this can result in a dense and tough cake.
Continue to fold the ingredients together until just combined, making sure there are no streaks of dry flour remaining. The batter should be smooth and slightly thick.
Once the wet and dry ingredients are fully incorporated, the cake batter is ready to be poured into the prepared cake pans. Make sure to evenly divide the batter between the pans for even baking.
Now you can proceed with baking the cake as per the recipe instructions. The proper combination of wet and dry ingredients will contribute to a scrumptious gluten-free chocolate cake that everyone can enjoy.
2.5. Tips for ensuring a smooth cake batter
To ensure a smooth cake batter for your delicious gluten-free chocolate cake, follow these helpful tips:
1. Use room temperature ingredients: It is important to let your eggs, butter, and milk come to room temperature before starting. This will allow for better incorporation and smoother texture.
2. Sift the dry ingredients: Sifting the gluten-free flour, cocoa powder, and baking powder together helps to remove any lumps and aerate the mixture. This will result in a lighter and more even batter.
3. Mix wet and dry ingredients separately: In two separate bowls, mix the wet ingredients (such as eggs, milk, and vanilla extract) and dry ingredients (flour mixture, sugar, and salt). Combining them separately before mixing together will ensure a smoother batter.
4. Gradually add dry ingredients to wet mixture: Slowly incorporate the dry ingredients into the wet mixture, stirring gently with a spatula or whisk. This gradual addition helps to prevent clumps and promotes a smoother consistency.
5. Avoid overmixing: Once the dry ingredients are fully incorporated, be careful not to overmix the batter. Overmixing can lead to a dense and tough cake. Mix just until the ingredients are combined and no lumps remain.
By following these tips, you’ll have a smooth and perfectly textured cake batter ready for baking your delicious gluten-free chocolate cake!
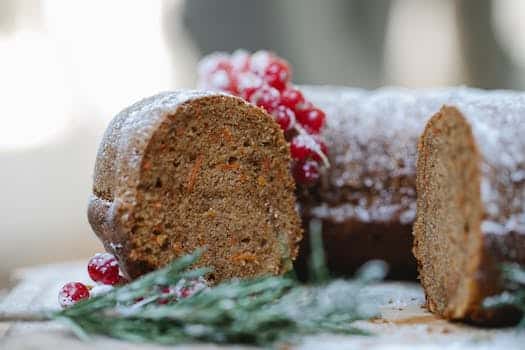
3. Baking and Decorating the Cake
Baking and Decorating the Cake
Once you have gathered all the necessary ingredients for this delicious gluten-free chocolate cake recipe, it’s time to start baking! Preheat your oven to the required temperature mentioned in the recipe. Next, prepare the cake pans by greasing them with butter or lining them with parchment paper to prevent the cake from sticking.
In a large mixing bowl, combine the gluten-free flour blend, cocoa powder, baking powder, and salt. Mix them well to ensure all the dry ingredients are evenly incorporated. In a separate bowl, beat the eggs until they become frothy and pale in color. Gradually add the sugar and continue beating until the mixture becomes smooth and creamy.
Now, it’s time to incorporate the dry ingredients into the wet mixture. Add the dry ingredients in three batches, alternating with the milk. Make sure to start and end with the dry ingredients. Gently fold the mixture using a spatula until everything is well combined. Avoid overmixing as it may result in a dense cake.
Divide the batter equally between the prepared cake pans. Smooth the tops with the back of a spoon or a spatula to ensure even baking. Place the pans in the preheated oven and bake for the specified time in the recipe. To check if the cake is done, insert a toothpick into the center. If it comes out clean or with a few crumbs, the cake is ready.
Once the cakes are baked, remove them from the oven and let them cool in the pans for about 10 minutes. Then, transfer the cakes onto a wire rack to cool completely before decorating.
When it comes to decorating, the options are endless. You can frost the cake with a delicious chocolate ganache, cream cheese frosting, or buttercream frosting. You can also add a layer of fruit preserves or fresh berries between the cake layers for added flavor and texture. Get creative with the decorations by using edible flowers, sprinkles, or chocolate shavings.
Remember to let your creativity shine while decorating the cake. Once you’re done, slice a piece and savor the moist and chocolaty goodness of this gluten-free chocolate cake!
3.1. Preheating the oven
Preheating the oven is an essential step in baking a delicious gluten-free chocolate cake. To ensure that the cake bakes evenly and rises properly, preheating the oven to the correct temperature is crucial. Here’s how to preheat the oven for this delectable cake recipe:
1. Begin by checking the recipe for the recommended oven temperature. In this case, the gluten-free chocolate cake recipe suggests preheating the oven to 350°F (175°C).
2. Make sure the oven rack is positioned in the center of the oven. This allows for even heat distribution during baking.
3. Remove any oven racks or baking sheets that may be stored inside the oven.
4. Turn on the oven and set it to the desired temperature. Most ovens have a preheat option that allows you to easily select the desired temperature.
5. Give the oven ample time to reach the specified temperature. Depending on the oven, it may take around 10-15 minutes for it to preheat fully.
6. Once the oven reaches the recommended temperature, it is ready for baking the gluten-free chocolate cake. Proceed to the next section for instructions on baking and decorating the cake.
3.2. Pouring the batter into the cake pan
Once you have prepared the gluten-free chocolate cake batter following the previous section, it is time to pour it into the cake pan. This step is crucial for ensuring an evenly baked and perfectly shaped cake.
To begin, make sure your cake pan is clean and greased. Greasing the pan will prevent the cake from sticking to the sides, making it easier to remove later.
Next, carefully pour the batter into the greased cake pan. Start from the center and let the batter spread out naturally towards the edges. Use a spatula or the back of a spoon to smooth the surface of the batter, ensuring it is level.
Be careful not to overfill the pan, as the cake will rise during baking. Leave some space at the top to allow for expansion. If you have excess batter, you can use it to make cupcakes or another smaller cake.
Once the batter is poured into the pan, gently tap the pan on the counter a few times to release any air bubbles trapped in the batter.
Now, your cake pan is ready to go into the preheated oven for baking. Follow the instructions in the next section to learn about the baking time and temperature.
3.3. Baking the cake
Baking and Decorating the Cake
Once you have gathered all the necessary ingredients for the delicious gluten-free chocolate cake, it’s time to start baking and decorating. Follow these simple steps to create a mouthwatering cake that everyone will love.
1. Preheat the oven to the recommended temperature mentioned in the recipe. This ensures that the cake bakes evenly and rises perfectly.
2. In a large mixing bowl, combine the gluten-free flour, cocoa powder, baking powder, and salt. Whisk them together until well blended.
3. In a separate bowl, beat the eggs and sugar together until the mixture becomes light and fluffy. This step is crucial for a moist and airy cake.
4. Slowly add the melted butter and vanilla extract to the egg mixture while continuously beating. Mix well to incorporate all the ingredients.
5. Gradually add the dry ingredients mixture to the egg mixture, alternating with the milk. Stir gently until everything is well combined, but be careful not to overmix.
6. Grease the cake pans with butter or cooking spray and divide the batter equally between them. Smooth out the tops with a spatula.
7. Place the pans in the preheated oven and bake for the specified time mentioned in the recipe. To check if the cake is done, insert a toothpick into the center; if it comes out clean, the cake is ready.
8. Once baked, remove the cakes from the oven and let them cool in the pans for about 10 minutes. Then, transfer them to a wire rack to cool completely.
9. While the cakes are cooling, prepare the frosting of your choice. It could be a rich chocolate ganache, creamy buttercream, or a fluffy whipped cream frosting.
10. Once the cakes have cooled, it’s time to decorate. You can frost the cakes with the prepared frosting using a spatula or a piping bag. Get creative with different designs and decorations.
11. Finally, slice and serve the delicious gluten-free chocolate cake to your family and friends. They will be amazed by the taste and texture!
Baking and decorating a gluten-free chocolate cake can be an enjoyable experience. With the right ingredients and techniques, you can create a delectable dessert that everyone can enjoy, regardless of dietary restrictions.
3.4. Cooling the cake
After baking the cake, it is important to let it cool completely before decorating. This cooling process allows the cake to set and prevents the frosting from melting or sliding off. To cool the cake, carefully remove it from the oven and place it on a wire rack. The rack allows air to circulate around the cake, promoting even cooling. Avoid placing the hot cake on a cold surface, as this can cause the bottom of the cake to become soggy. Let the cake cool for at least one hour or until it reaches room temperature. Once cooled, it is ready to be decorated with your favorite frosting or toppings.
3.5. Decorating the gluten-free chocolate cake
Decorating the gluten-free chocolate cake is a fun and creative process that adds the finishing touch to this delicious dessert. There are many ways to decorate a gluten-free chocolate cake, and the possibilities are endless. Here are some ideas to inspire your creativity.
One popular way to decorate a gluten-free chocolate cake is with chocolate ganache. Ganache is a smooth and creamy mixture of chocolate and heavy cream. To make ganache, simply heat the cream until it starts to simmer, then pour it over the chocolate chips. Let the mixture sit for a few minutes, then stir until smooth. Once the ganache has cooled slightly, pour it over the cake and use a spatula to spread it evenly.
Another option is to use fresh fruits to decorate the cake. Strawberries, raspberries, and blueberries not only add a pop of color to the cake but also provide a refreshing and fruity contrast to the rich chocolate flavor. Arrange the fruits on top of the cake in a decorative pattern or simply scatter them around for a more casual look.
If you want to get really creative, you can try piping buttercream frosting onto the cake. Buttercream frosting is a versatile and easy-to-make frosting that can be dyed in various colors and piped into different designs. You can use a piping bag fitted with a star-shaped tip to create swirls, rosettes, or any other design you desire.
Lastly, you can sprinkle some toppings on the cake to add texture and flavor. Chopped nuts, shredded coconut, or chocolate shavings are all great options. Simply sprinkle them over the frosted cake and gently press them in to ensure they stick.
Remember, decorating a gluten-free chocolate cake is all about letting your creativity shine. Don’t be afraid to experiment with different techniques and decorations to create a unique and stunning cake that will impress your family and friends.
Conclusion
In conclusion, this delicious gluten-free chocolate cake recipe is a must-try for anyone looking for a decadent and indulgent treat. With its rich chocolate flavor and moist texture, it will satisfy even the most discerning of cake lovers. Whether you have dietary restrictions or simply love chocolate, this recipe is sure to impress. So go ahead, gather the ingredients, and indulge in a slice of pure chocolate bliss!